
WIDIA - Полный каталог инструмента - 2017
для размещения заказа - zakaz@widiahanita.ru
TopGroove™
Failure and Solution Guide
Grooving Tool Failure and Solution Guide
Practical Solutions to
Common Grooving Problems
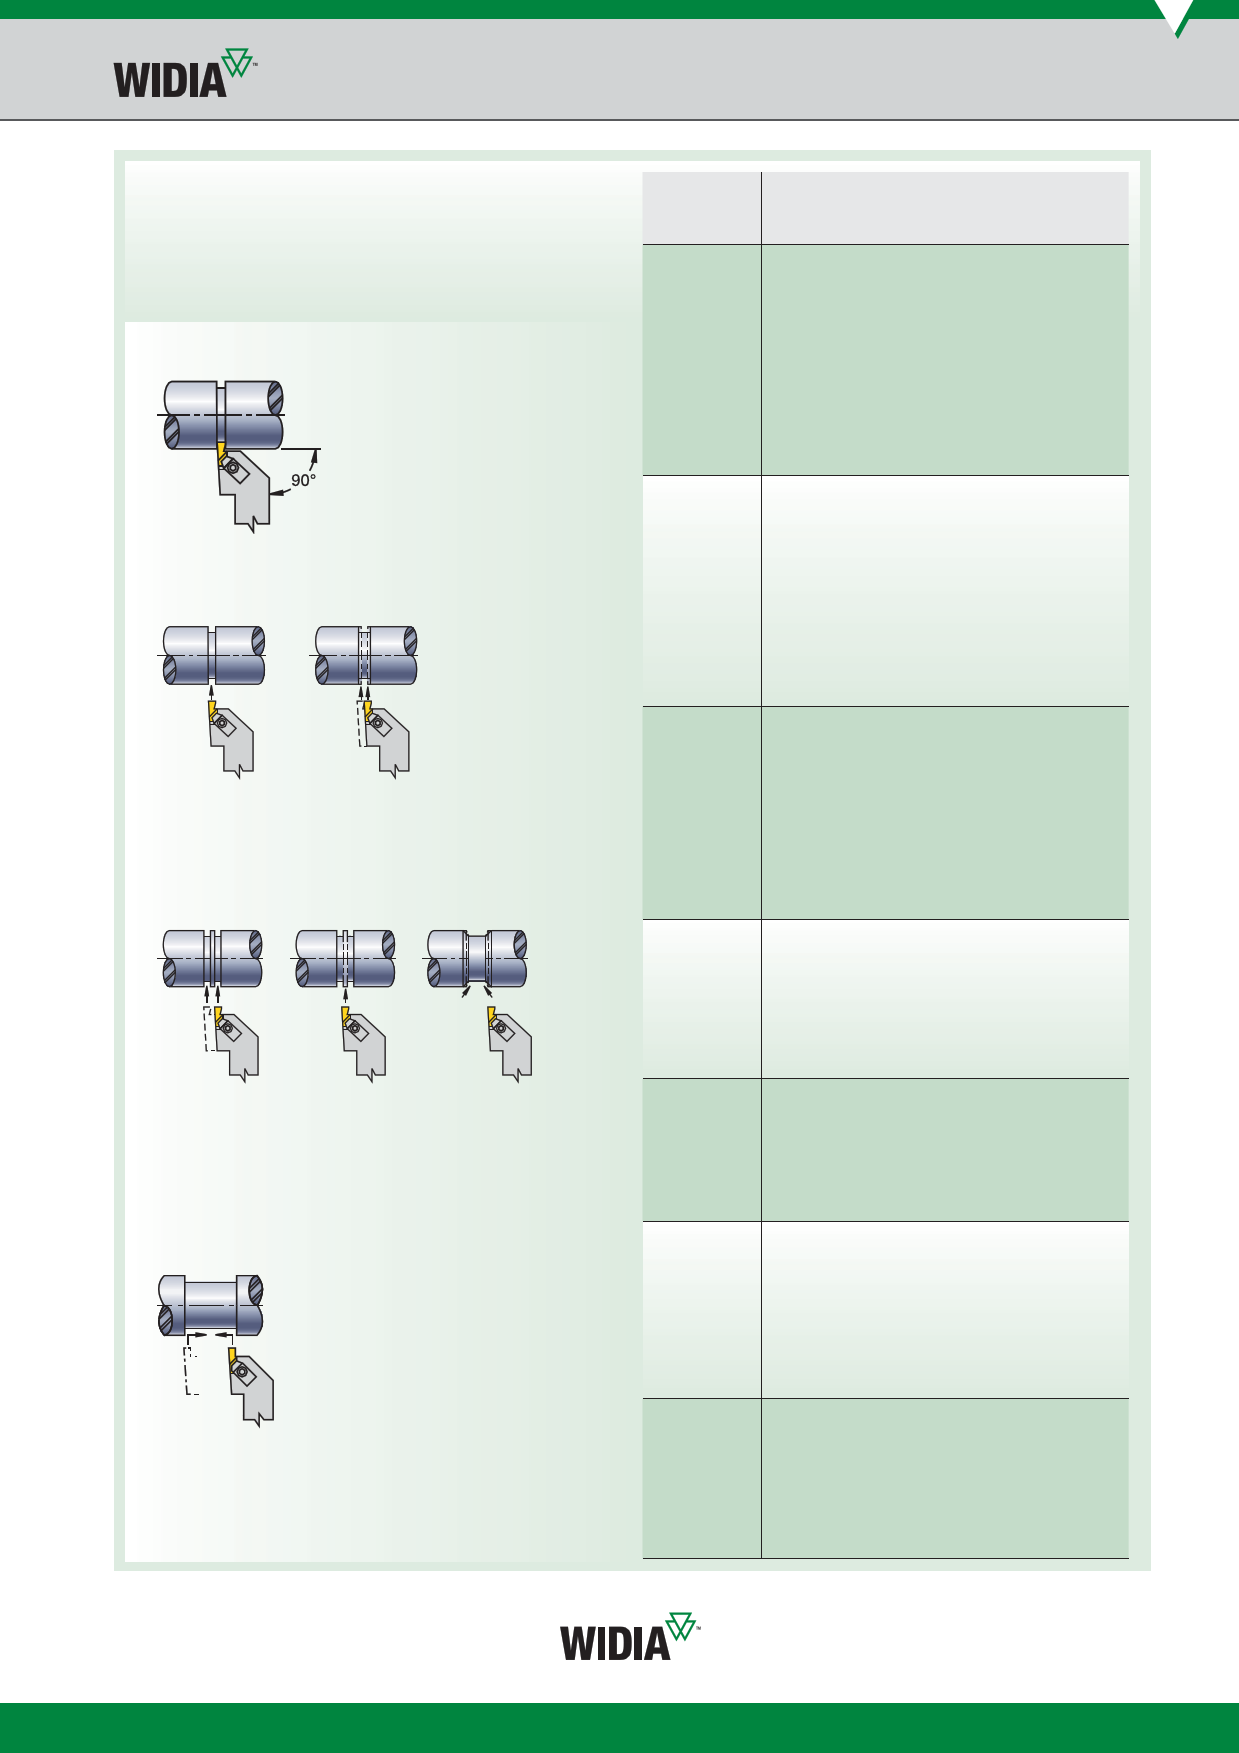
Holder Position for Grooving Operation
problem
solution
1. Ensure tool centre height.
2. Use sharp tool (index more often).
3. Use positive rake PVD-coated insert.
bur
4. Use correct grade for workpiece material.
5. Use correct geometry (e.g., positive rake
for work-hardening material).
6. Chamfer before grooving.
7. Change tool path.
How to Cut a Groove Slightly
Wider than the Groove Tool
poor
surface finish
1. Increase speed.
2. Use sharp tool (index more often).
3. Dwell tool in bottom 1–3 revolutions (max).
4. Use proper chip control geometry.
5. Increase coolant flow/concentration.
6. Ensure proper setup (overhang, shank size).
7. Use correct geometry (e.g., positive rake for
work-hardening material).
1. Plunge the centre of the groove.
2. Plunge each side of the groove to get the specified width.
Use a slower feed rate when cutting groove sides.
How to Cut Wider Grooves
1. Plunge out both sides of groove width.
2. Plunge centre area to remove web of material remaining.
3. Plunge both sides of groove at the required angle, using
approximately one-half the width of the grooving tool
for maximum width of cut.
Finish Turning the Groove
groove bottom
that is not flat
1. Use sharp tool (index more often).
2. Dwell tool in bottom 1–3 revolutions (max).
3. Reduce tool overhang (increase rigidity).
4. Ensure correct tool alignment.
5. Reduce feed rate at groove bottom.
6. Use a wider insert.
7. Ensure tool centre height.
poor
chip control
1. Use “K” chip control geometry insert.
2. Use sharp tool (index more often).
3. Increase coolant concentration.
4. Adjust feed rate (usually increase first).
chatter
1. Reduce tool and workpiece overhang.
2. Adjust speed and feed (usually increase first).
3. Ensure centre height.
insert
chipping
1. Use correct grade for workpiece material.
2. Increase speed.
3. Reduce feed.
4. Use a stronger grade.
5. Increase tool and setup rigidity.
1. Follow recommendations explained above.
2. To avoid insert chipping and to achieve groove wall
perpendicularity, follow the tool path outlined here.
3. Use the lightest depth of cut that still enables good
chip surface finishing.
side walls
not straight
1. Check tool alignment for square.
2. Use correct insert hand.
3. Reduce workpiece and tool overhang.
4. Use sharp insert (index more often).
zakaz@widiahanita.ru
www.widiahanita.ru
E85